Sunday, December 26, 2010

Simple Sides


Planning the menu for Christmas dinner can turn a bit complicated in our family. As foodies, everyone wants to contribute to the meal, yet stay traditional. We usually have lamb and Dad’s famous horseradish mashed potatoes, but then us girls get to choose the rest of the dinner. This year Kathy made yummy stuffed-mushrooms as an appetizer. She filled them with cheeses and bacon, can we say, “more please?!?!”. Mom always thinks presentation, so she wanted to do something colorful she chose sautéed green beans and then glazed carrots. Now, glazed carrots can be good if done correctly, but I don’t think I’ll ever fall in love with them. I ate too many as a child, always being told I wouldn’t be able to see if I didn’t eat carrots. Well, sure enough I ate so many glazed carrots in my youth that I have 20-20 vision to this day. And although another helping of Vitamin-A rich vegetables is not a bad idea, I talked Mom out of them chose to make something different, roasted tomatoes.

I have learned how to make amazing slow roasted tomatoes at the National this past semester. However, we never really used them as a side, they were more for sauces and marinades. I prepared the tomatoes the same way. Using my new knife (great Christmas present!) I sliced the tomatoes in half. We used 2 small boxes of campari tomatoes. In a medium bowl I added ¼ cup extra virgin olive oil, 1 tsp sea salt, and ½ tsp black pepper, and a pinch of sugar. After tossing together I spread on a lined jelly roll pan. Note- I made the mistake of not lining the sheet tray with aluminum foil and clean up was a disaster! So, be sure to line the tray before spreading out the tomatoes. I put the tomatoes in the oven at 400° because that is the temperature the lamb was roasting. I think 350° for 45 minutes is better, but at a higher temperature oven it still works, just needs to be watched more closely. To make these tomatoes a little more interesting I decided to combine them with two of my favorite ingredients, balsamic vinegar and goat cheese. To make the balsamic reduction I put 1 ½ cups of balsamic vinegar with a teaspoon of sugar and let it simmer on medium high heat until reduced (aka it’s a thick sauce). Then I crumbled fresh goat cheese. Once the tomatoes were ready, I plated them, added a bit of cheese, and spooned the sauce over them. The flavor combination was delicious and added not only flavor, but a balance in taste to the whole menu. What a great way to celebrate Christmas!

Chocolate Fudge Upside Down Cake


When I think upside-down cake, an image of ooey gooey pineapple mess comes to mind. Despite this unappetizing picture, I decided to try making Na-Na’s famous chocolate upside down cake. Aunt Fran said it was one of her favorite desserts, and requested it as the end to our Christmas dinner. Luckily for me, I made this dish with Fran in the kitchen, her help was greatly appreciated! Na-na’s handwriting can be a bit illegible at times, so it was nice to have a personal translator. If Fran had not been there, the cake would have had a pound of butter, instead of a tablespoon. I guess I am too used to Paula Dean’s baking!

Chocolate Fudge Upside Down Cake

¾ c sugar
1 tblsp butter
½ c milk
1 c flour
¼ tsp salt
1 tsp baking powder
1 ½ tblsp cocoa powder
½ c sugar
½ c brown sugar
¼ c cocoa
1 ¼ c boiling water

Cream ¾ c sugar with 1 tblsp butter. Add milk and stir. In another bowl, sift flour, salt, baking powder, and 1 ½ tblsp cocoa powder. Add the dry ingredients to the wet ingredients. Place mixture in a well greased cake pan. Combine ½ cup sugar, the brown sugar, and ¼ cup cocoa together. Sprinkle over the wet batter. Pour boiling water over the top. Bake at 350 ° for 30 minutes. (optional: add nuts to batter or garnish on top).

Pouring boiling water over cake batter seemed a little odd to me. Was I going to ruin the cake? Why make the batter into soup? I could not make sense of it, but I trust these recipes and went along with it. And, it turned out amazing! During the cooking process the boiling water turns the top of the cake into an unbelievable fudgey ganache. Yes, it is ooey gooey, but chocolate mess will always be better than pineapple mess! This warm chocolate delight was perfect for the finale of our Christmas dinner, served with vanilla bean ice cream, it was unbelievable!

Wednesday, December 22, 2010

Tea Time Tassies


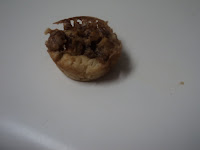
As I continue my venture into old timey recipes, I decided to celebrate the Christmas season by baking my great-grandmother’s favorite cookies, Tea Time Tassies. My great aunt Fran who is coming to visit us for Christmas requested these, saying they are just delicious. Mom remembers making these and M&M cookies with Na-Na at Christmas time. She says they taste just like mini pecan pies. So, after hearing rave reviews on taste and presentation (they are just precious according to Mom) I decided to start the recipe. Although it calls for 3 sticks of butter, I’m sure it will be worth it. And isn’t that why New Year’s comes after Christmas? So we can work off all the holiday weight? I think yes, so let the baking begin.

Tea Time Tassies

1 3-oz package cream cheese
1½ lb butter*
1 c flour
1 c brown sugar
1 tsp vanilla
1 egg
1 dash salt
1 c nuts (pecans chopped)

Blend cream cheese, 1 stick of butter (½ cup), and 1 cup flour over slow heat. Put in refrigerator for 1 hour*. Pinch off balls of pastry and spread with fingers into small muffin tins. Beat 1 lb soft butter, brown sugar, vanilla, egg, and salt. Then add nuts. Put mixture into pastry shells. Bake at 325° for about 25 minutes or until light brown.

This was one of the first recipes where I noticed a major difference from baking recipes we use today. It called for oleo instead of butter. Oleo is made from vegetable oils and can be a substitute for butter. The recipe says to put in the dough in the refrigerator for an hour, but I popped in the freezer for *30 minutes. After all, we want everything instantaneously nowadays.

Even though I have made a few of my own changes, it would be nice to have Na-Na here guiding me along the way. A few mistakes took place today. I should have filled the shells half-way. I went a little overboard and filled them to the top, causing them to overflow the tins in the oven. I would also not put so much dough in each muffin tin. You only need a marble size of dough per tin. They turned out warm, sweet, and quite yummy. But had a little too much dough. The filling was great except for the slight disaster in presentation, however the flavors in the recipe are definitely a hit!

Making these precious little treats was a fun adventure, that probably needs repeating. While creating this dessert, I wondered why they are called “tassies”. After getting 33,000 Google search, I finally came to an answer. Tassies are in fact miniature pecan pies made with a cream cheese dough. Simple enough, and quite delicious! Thank you Na-Na!

Tuesday, December 21, 2010

Mac and Cheese


It’s Christmas break. No school. No work. And lots of free time. So, I’ve begun this project. I am going through all of my great grandmother’s recipe books and picking out recipes that seem special and delicious. I’m consulting family members and using my own speculation in choosing the recipes (there are 100s in the books, I wish I could do them all!). After looking through all of them, I feel like I am closer to a woman I never got the chance to meet, Na-Na. My mom had such a special relationship with Na-Na growing up in Greenville, SC. Sunday dinners at her house are some of my mom’s favorite childhood memories. My first dish in this adventure was Macaroni and Cheese. As my favorite comfort dish, I only found it fitting to try this first.

Na-Na’s Macaroni and Cheese
1 lb macaroni (cooked and drained)
2 ½ c shredded cheddar cheese
3 tblsp butter
1 tsp salt
½ tsp cayenne pepper
½ c milk
2 eggs
½ c buttered bread crumbs

Cover bottom of baking dish with layer of macaroni. Sprinkle cheese and bits of butter, salt, and pepper. Continue to layer in the same order until all is used up, having cheese on top. Mix eggs and milk together, pour over dish. Top with bread crumbs. Bake at 350° for 30-35 minutes, or until golden brown on top and eggs are completely cooked.

I had to change the recipe a bit. I added more cheese, as I believe you can never have enough cheese. I also had to indicate the temperature of the oven and time because the recipe only indicates to cook in a moderate oven. To make buttered bread crumbs I melted ½ tblsp of butter and mixed it into the bread crumbs. Even with the slight modifications, the dish turned out to be delicious. The cayenne gives it a subtle kick of heat that perfectly contrasts the creaminess of the cheese. This mac and cheese is the perfect comfort food on a cold winter day!

Friday, December 3, 2010

The Last Supper

What would your final meal be? This is one of the interview questions we have been giving potential recruitment counselors. As a foodie, this question has really made me think. Would I want a gourmet dinner or a homecooked meal? Does it need to be a fancy frou-frou dining, or could it just be good old comfort food? In conclusion, I decided it would have to Mom’s unbelievable spaghetti Her use of fresh vegetables makes it unlike any other spaghetti sauce I’ve had. But most importantly, she makes it with love. On a cold winter today, a plate of her spaghetti is all I need to be perfectly happy.

Today was my final day at The National for this semester. Where did the time go? I feel like it was only yesterday I walked into that kitchen nervous and intimidated. I had no idea how much I would learn. My skills in the kitchen have greatly improved, and I feel like I have a much better understanding of flavor combinations. My tasks today, once again taught me techniques and recipes that will be useful in the rest of my culinary career.

I began the day prepping the lamb. Mixing the seasonings and onions and peppers with the ground meat. Then rolling them into the little nuggets that would be used for the pitas again. Then I helped work on a catering for a 6 year old. I cut up carrot sticks and made buttermilk dressing. The dressing is simple 2 cups mayonnaise, 1 cup sour cream, thinned with buttermilk. 4 cloves garlic minced, dill, parsley, chives, mustard seed, smoked parika, and salt and pepper. Once mixed well, it is ready to go! After helping with the catering, I helped the pastry chef by slicing a parsnip cake into 10 pieces. I had to do this strategically by first cutting it in half and then eyeballing how to make 5 uniformed pieces out of each half.

Later on, I was given the chance to braise beef cheeks. First, I had to drain them, then I seasoned them simply with only salt and pepper. The meat was ready to be seared! I heated corn oil in a large rondeau. Once I could see bubbles in the oil, I placed the meat in the pot. I let it sear until a nice brown crust formed on the outside of the meat. I turned the meat until all sides had that great crispy layer. I transferred the meat to a large hotel pan that would later have veggies and stocks added to it and then popped in the oven until the meat is fork tender. After I finished searing the meat, it was time to cook vegetables in the remaining oil. This was a bit of a disaster. As I dropped the vegetables into the rondeau, the hot oil splashed on my wrist. OWWWW! That did not feel good. I put the burn under cool water, and then didn’t think too much more of it. Until I left, took a good look, and realized it might be more serious than I thought, so I went to the drugstore and got burn cooling pads, that seem to have really helped. The injury is really only an afterthought when I think about my day spent there. Once again I learned that a kitchen is a dangerous place and you have to be extra attentive and careful when doing anything and everything!

As I left (had to leave early again for recruitment counselor interviews) I decided to get a final lunch to go. For once I decided to try the power lunch. It was unbelievable. There were four components. I had quinoa with green beans and feta tossed in a lemon vinaigrette; arugala with beets and marconas (a type of almond) tossed in the lemon vinaigrette as well; then grilled broccoli with red chili flake; and finally sautéed kale with chickpeas deglazed with sherry vinegar. It was the perfect finale to my lovely experience this semester at The National.

Wednesday, December 1, 2010

Behind the Scenes

The majority of the components that go into each dish are made ahead of time. I am not just talking about slicing up veggies for a salad. I am also talking about condiments, seasonings, and individual elements of the dish. The bad weather has been keeping customers away, making each of the chefs more prepared for today’s service due to the surplus of ingredients prepped in the past few days. But, of course there was still work to be done. After a week off for Thanksgiving break, I was back and ready to get started.

My first project was picking spinach leaves. Although a tedious task, removing the stems from this iron-packed veggie makes it easier to cook with and eat. Then I moved on to more exciting tasks like making polenta. The National uses Red Mule polenta. To make you combine a quart and a half of water with a quart and a half of whole milk. Once that simmers, mix in a quart of polenta. Then add butter and parmesan cheese until thick and creamy. The polenta was the bed for shrimp and chorizo, yummy!

Next, I made tomato jam. The jam is one of the condiments used on the lamb pita. To make, you combine slow roasted tomatoes, with red wine vinegar, sugar, minced garlic, mixed ginger, dried chilies, toasted mustard seed, and fish sauce. Let simmer until most of the liquid is absorbed. Then you puree the mixture in the robot coupe until you get a uniformed consistency. The jam has a texture like tomato sauce, but the flavor is an interesting balance of sweet and spicy. I continued more prep for the lamb pita. Because not everything was ready for the dish (the meat was not completely thawed at the start of service) we did not put it on the lunch menu, but then we ran it as the special when everything was complete. To prepare the meat, I got as much thawed meat as possible, then seasoned with salt, pepper, cumin and coriander. I also mixed in some sautéed onions and peppers for extra flavoring and then rolled them into the small nuggets. Once all the components were ready, we were able to assemble them on order. Pitas are steamed on the French top and then smothered with horseradish cream and the tomato jam. Then layered with bibb lettuce, three lamb nuggets (that are sautéed on one side and then finished in a 600 ° oven until medium rare), then topped with more sautéed onions and peppers, and wrapped in aluminum foil to give the presentation a street-food type feel.

To finish off the day, I quarted up the marinated olives. Turns out there were 16 quarts of olives, that’s a lot! The orange flavor was pungent on my fingers the rest of the day, and I wore gloves! Then I cooked chicken two ways. First I grilled and then roasted off some breasts for the chicken salad. I also rubbed a few breasts in salt, pepper, and dried thyme and then roasted those for a chicken noodle soup. My final project was making sure everything in the walk-in was labeled because the health inspector is expected any day now. By the end of this project, I was freezing! But, I finished everything and ended my day with a warm, delicious ham and cheese sandwich.